
DIY Ultrasound Phantom Pad
Objective
To create a reusable, low-cost ultrasound phantom for practicing ultrasound-guided peripheral IV (PIV) insertion, using basic materials and a simple mold setup.
Last updated July 23, 2025
Development Blog
Materials
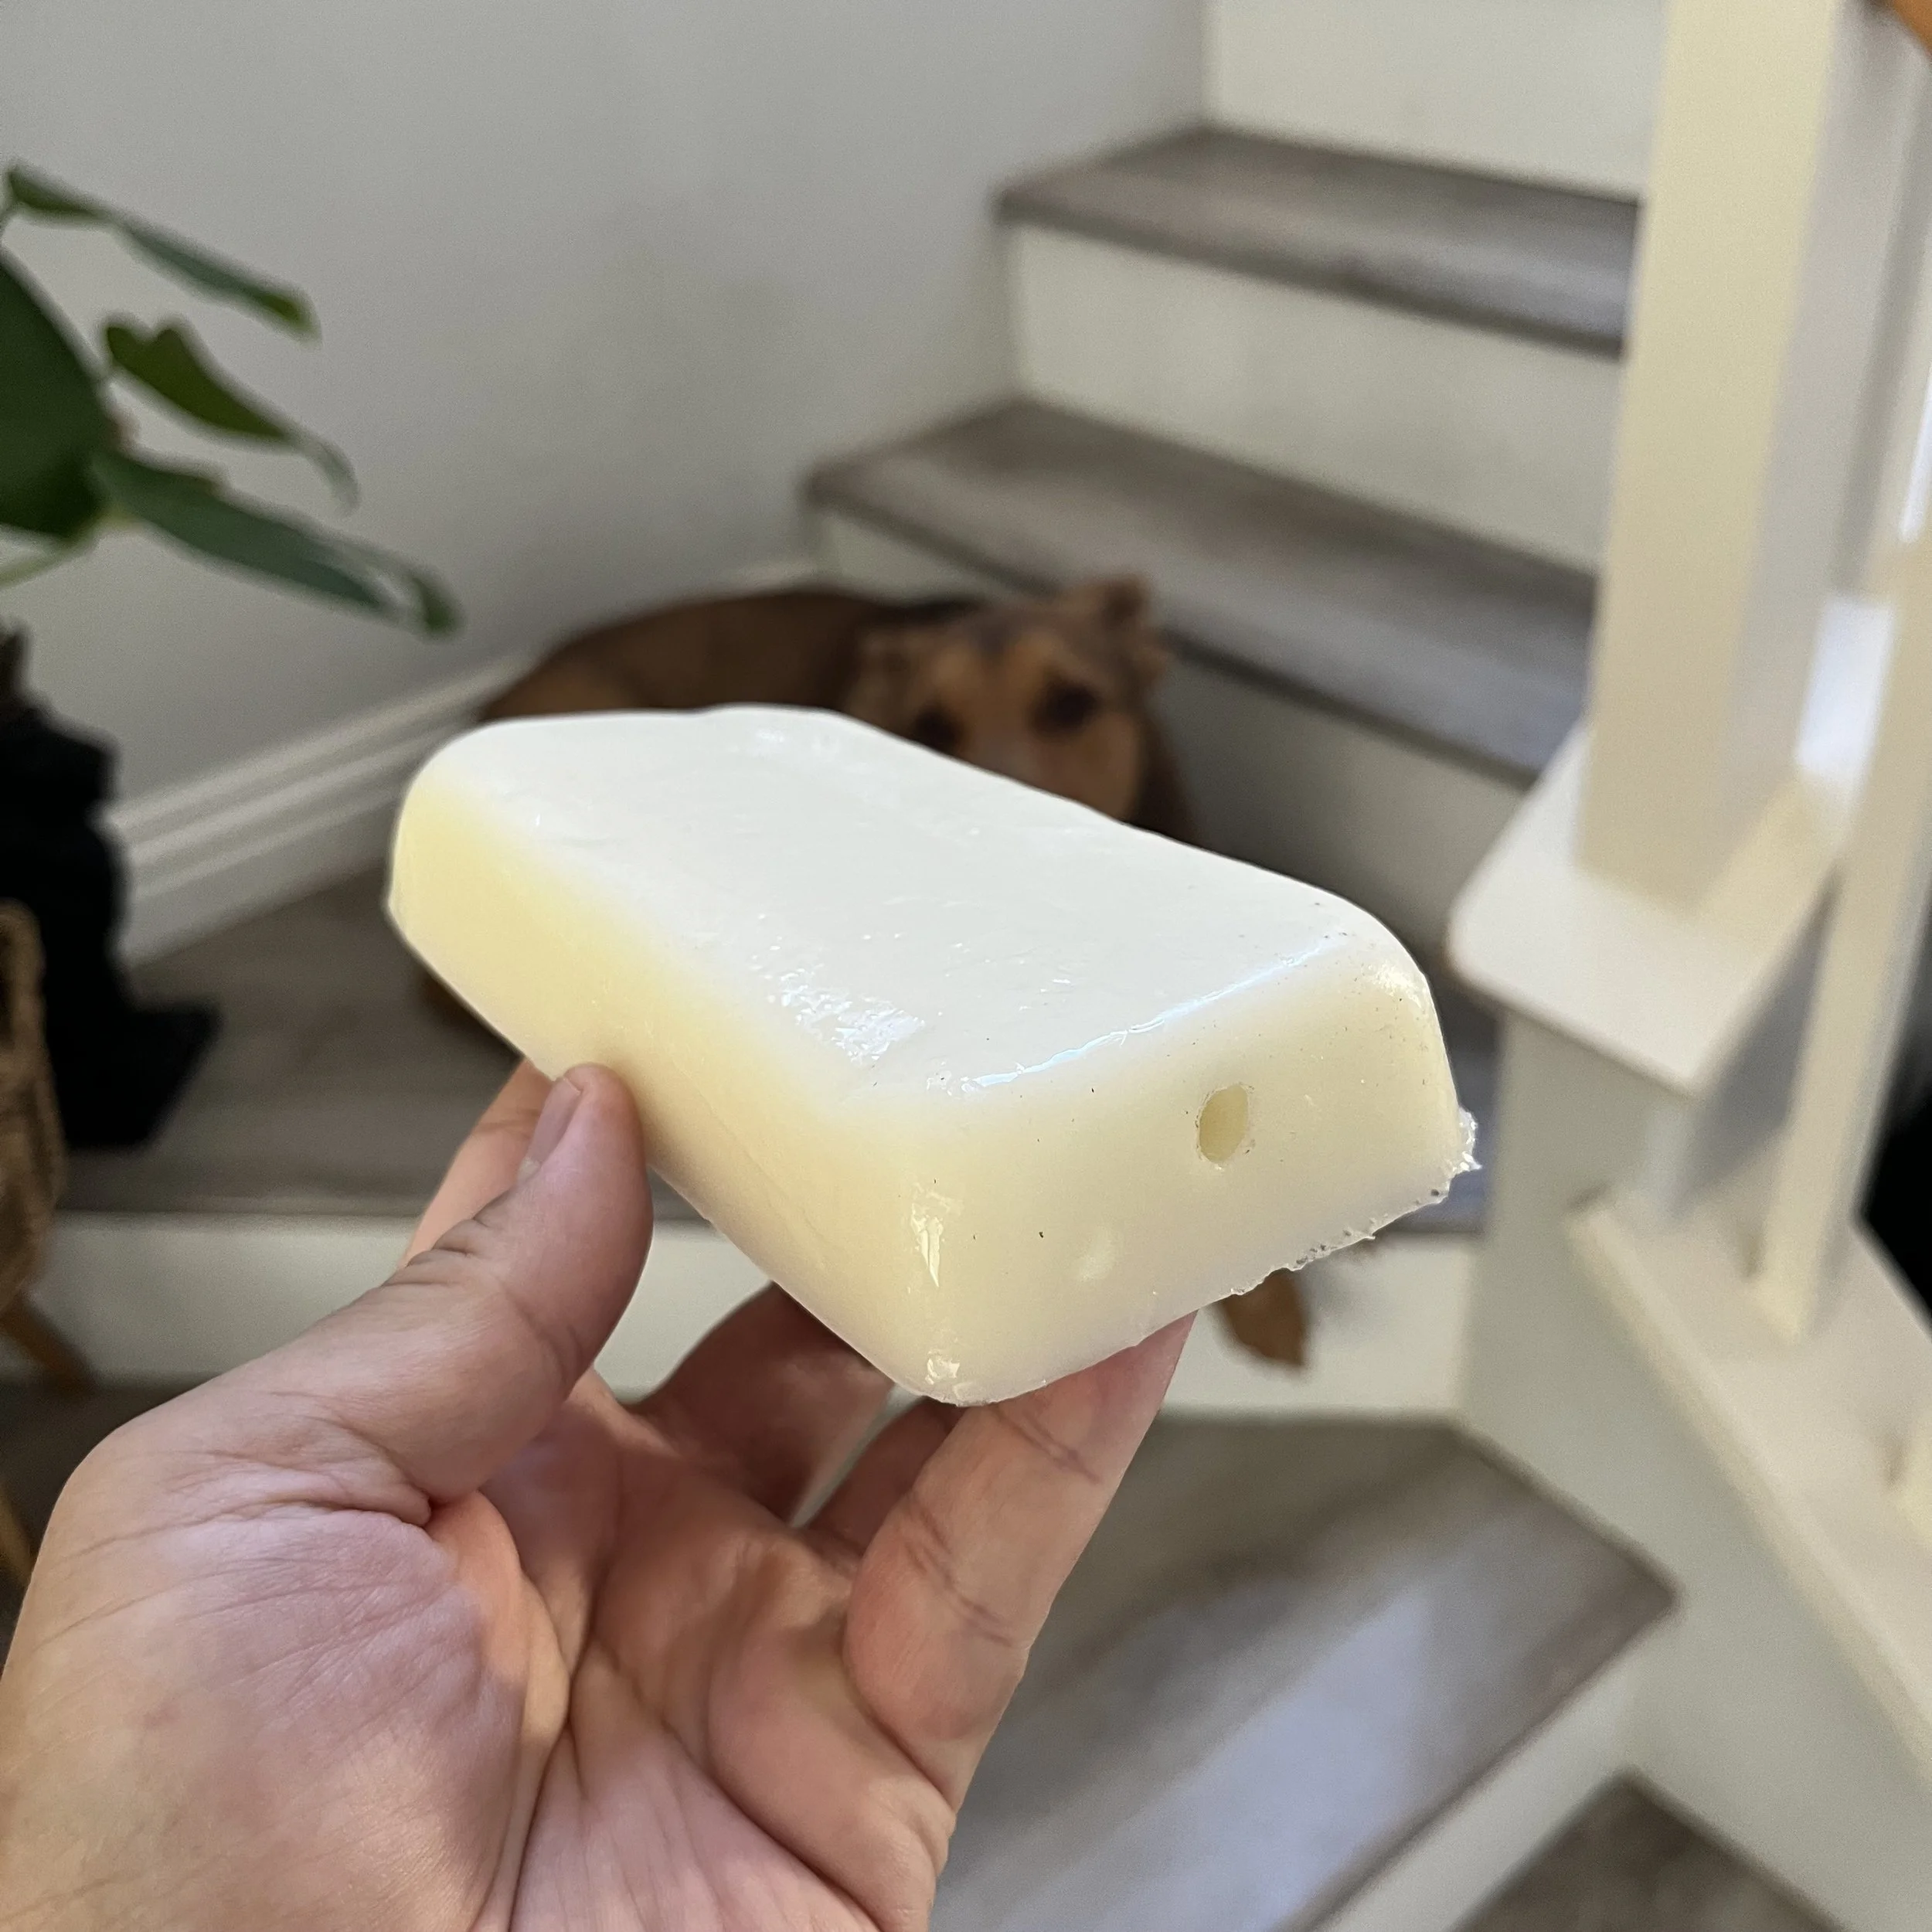
Ballistic gel (re-meltable)
Ratio: 5 parts gel to 1 part cornstarch by weight (i.e. 10–20% gel concentration with 10% cornstarch)
Cornstarch (echogenicity enhancer)
Cold water (to make cornstarch slurry)
Silicone tubing (to simulate veins)
Small bread baking pan (nonstick metal, as shown)
Grommets or rubber washers (to seal tubing holes)
Drill or heated tool (to make holes for tubing)
Measuring tools (scale and volume cup)
Heat source (microwave or double boiler)
Stirring tool or immersion blender
Mold Setup (Tubing Pass-Through Method)
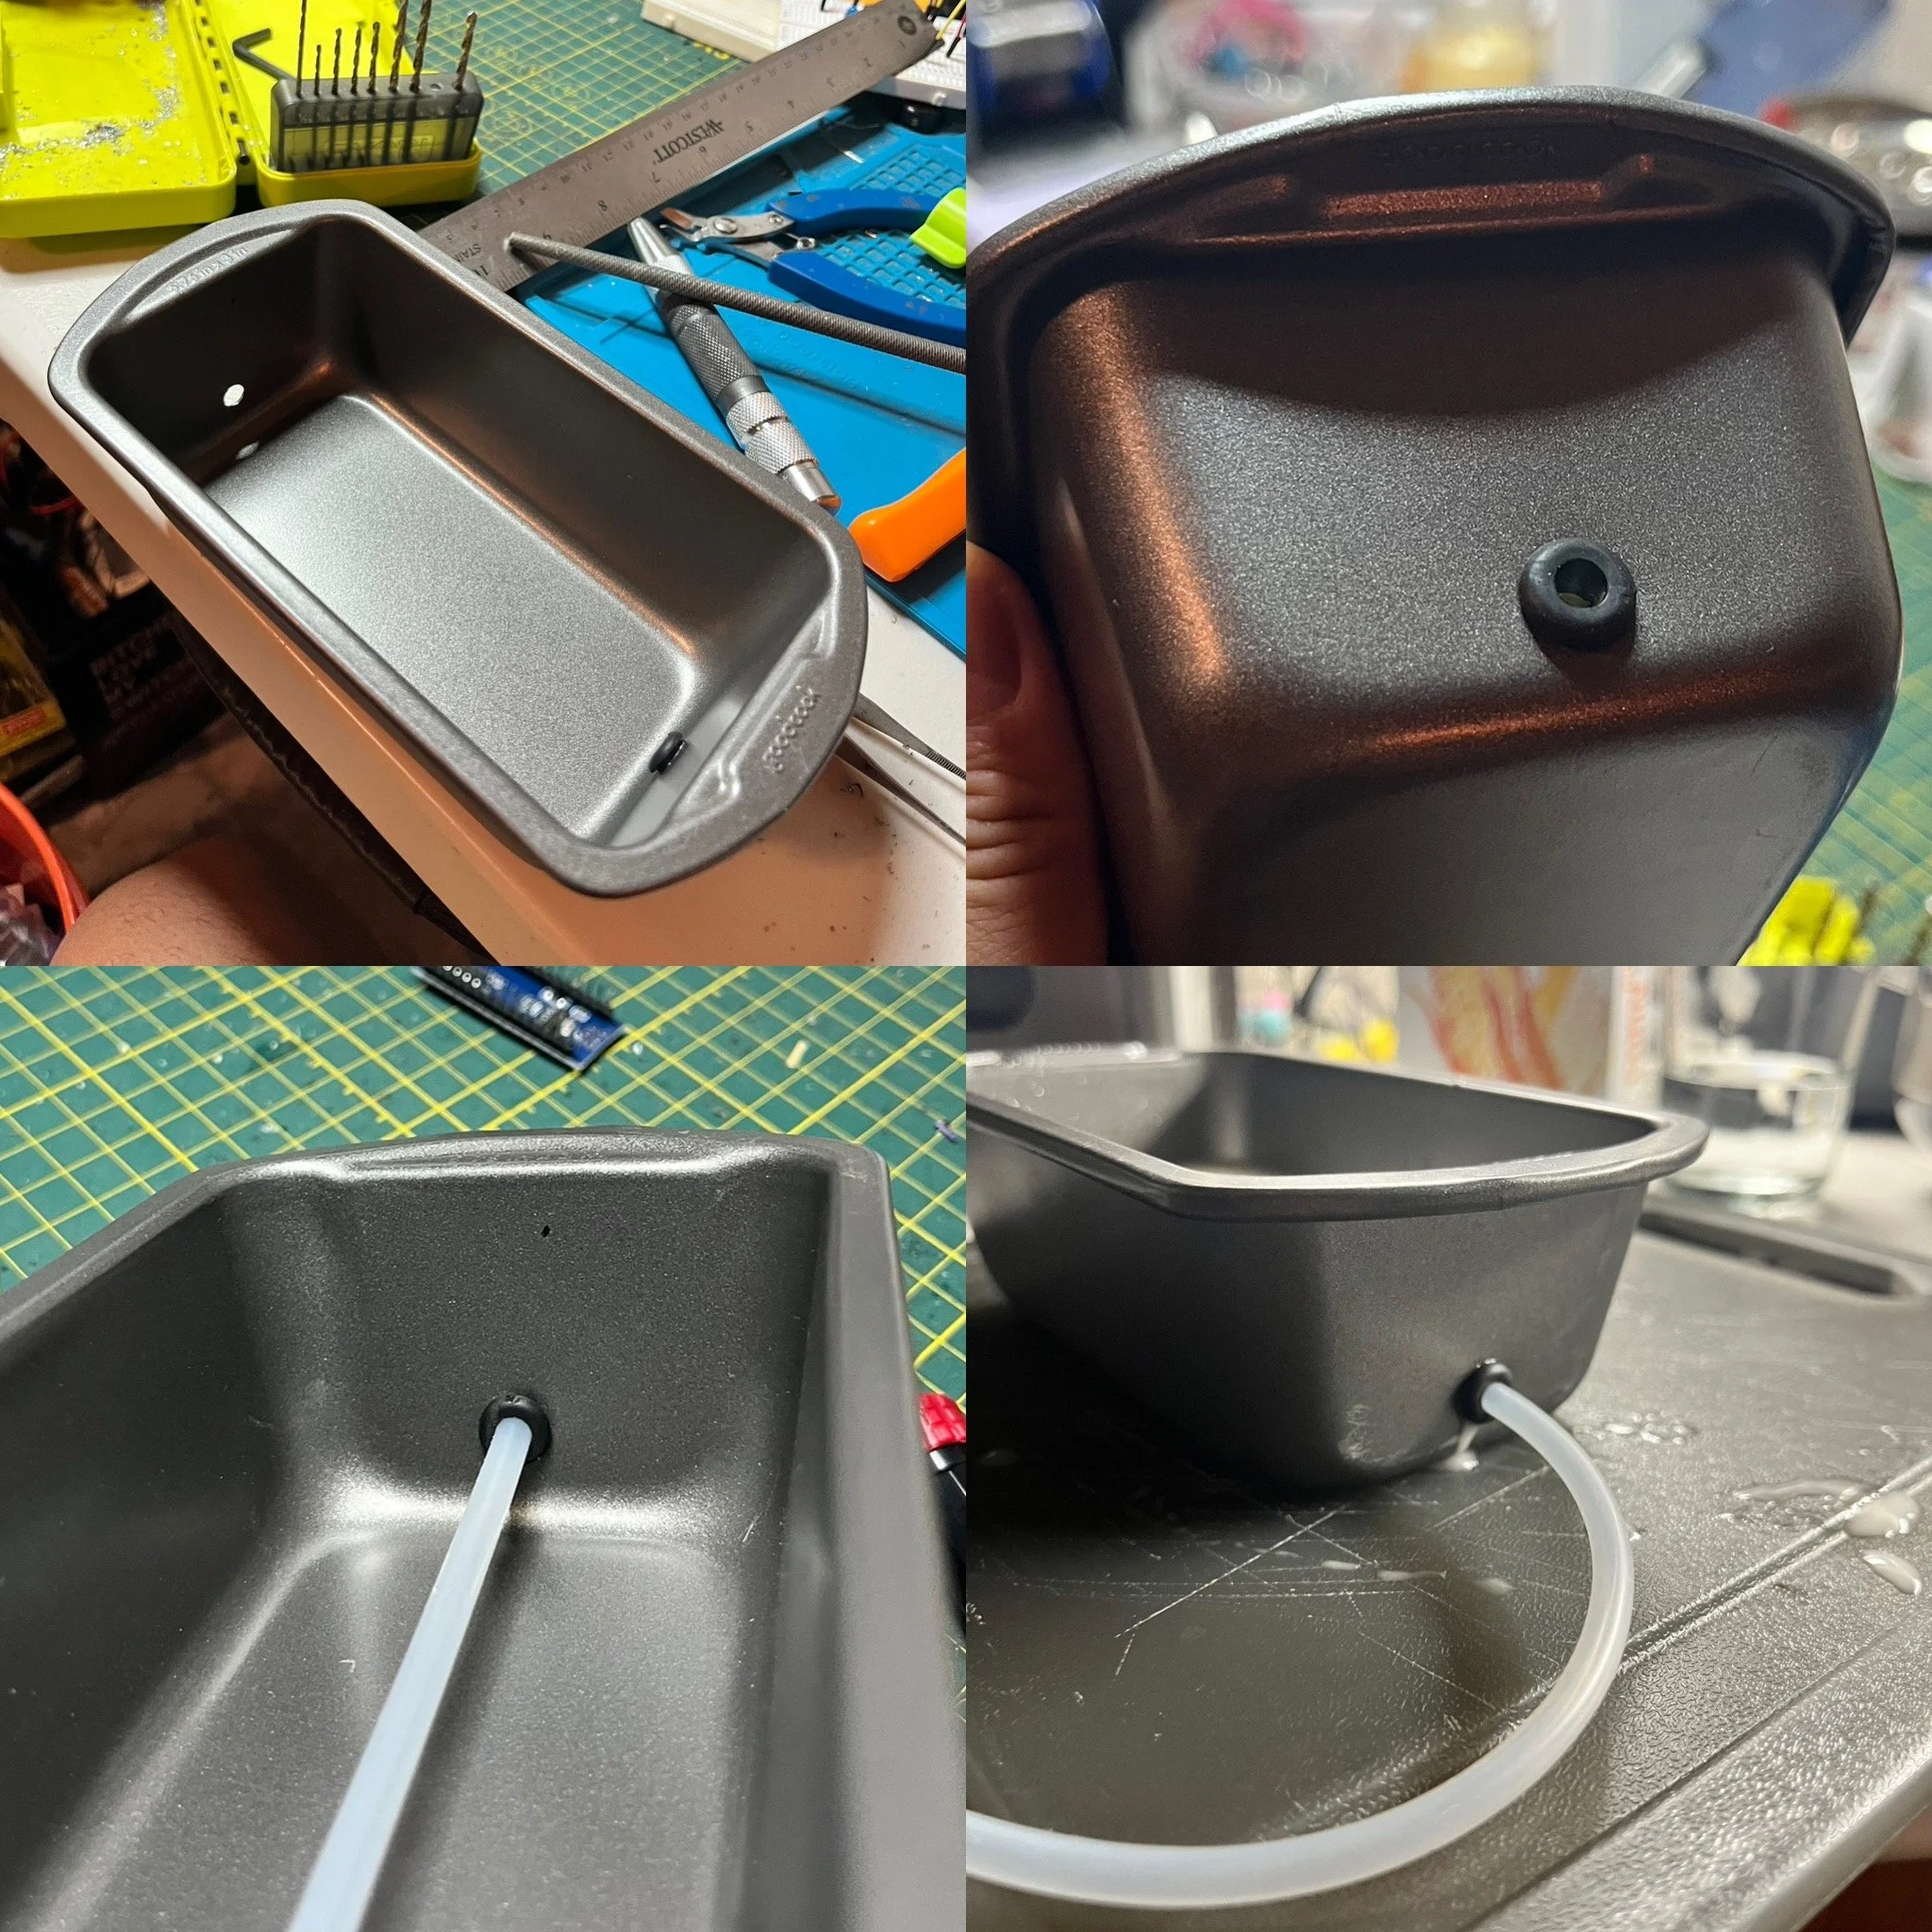
As shown in the image above, you can drill two small holes near the base of the bread pan to allow tubing to pass through. Feed silicone tubing through both sides of the pan and secure with rubber grommets or washers to prevent hot gel from leaking when poured. You can seal further with food-grade caulk or a temporary clamp until set. Be mindful of depth. I put the holes 1 cm from the bottom of the pan.
Instructions
Prepare the mold: Begin by drilling two small holes on opposite sides near the bottom third of a small bread pan. Feed the silicone tubing through these holes to simulate a vessel path, and secure each side with grommets or rubber washers to minimize leakage when the hot gel is poured. Ensure the tubing is stable and level, and elevate the mold slightly if needed to prevent the tubing from shifting during setup.
Melt the ballistic gel: Cut your ballistic gel into small cubes and heat it slowly using a microwave in short intervals or a double boiler until it reaches a fully liquefied state, ideally around 130–140°F (55–60°C). Avoid boiling, as this can alter the gel’s consistency or reduce reusability.
Make the cornstarch slurry: In a separate container, combine one part cornstarch with two to three parts cold water by weight, stirring thoroughly until the mixture becomes smooth and lump-free. This slurry will help introduce echogenicity into the gel, mimicking soft tissue scatter on ultrasound.
Combine slurry and gel: Slowly pour the slurry into the melted gel while stirring continuously. Continue mixing for two to three minutes to ensure the cornstarch is evenly dispersed throughout the gel. An immersion blender can be used briefly here to improve consistency.
Pour into mold: Carefully pour the hot gel mixture into your prepared mold, covering the embedded tubing. Gently tap the pan on the counter to release any trapped air bubbles and make sure the tubing stays submerged and positioned correctly throughout the setting process. Make sure you don’t overpour as the height (thickness) of the overall product should be around 2-2.5 cm (with the vein being approximately halfway between the top and bottom).
Cool and cure: Allow the gel to cool and cure at room temperature for several hours, or place it in the refrigerator to accelerate the process. Once the block has fully set, you can fill the tubing with dyed saline to create anechoic vessels that respond realistically under ultrasound. You will need to plug one end of the pad to ensure the saline does not leak out.
Notes
Ratios: For example, if using 200 g of ballistic gel, use 20 g cornstarch and 40–60 mL water for slurry.
Echogenicity vs translucency: Adding cornstarch improves scatter but makes the block opaque.
Shelf life: Organic gelatin-based gel may degrade over time. Refrigeration helps, but synthetic alternatives or graphite powder may be better for long-term use.
Comparison Picture and Video
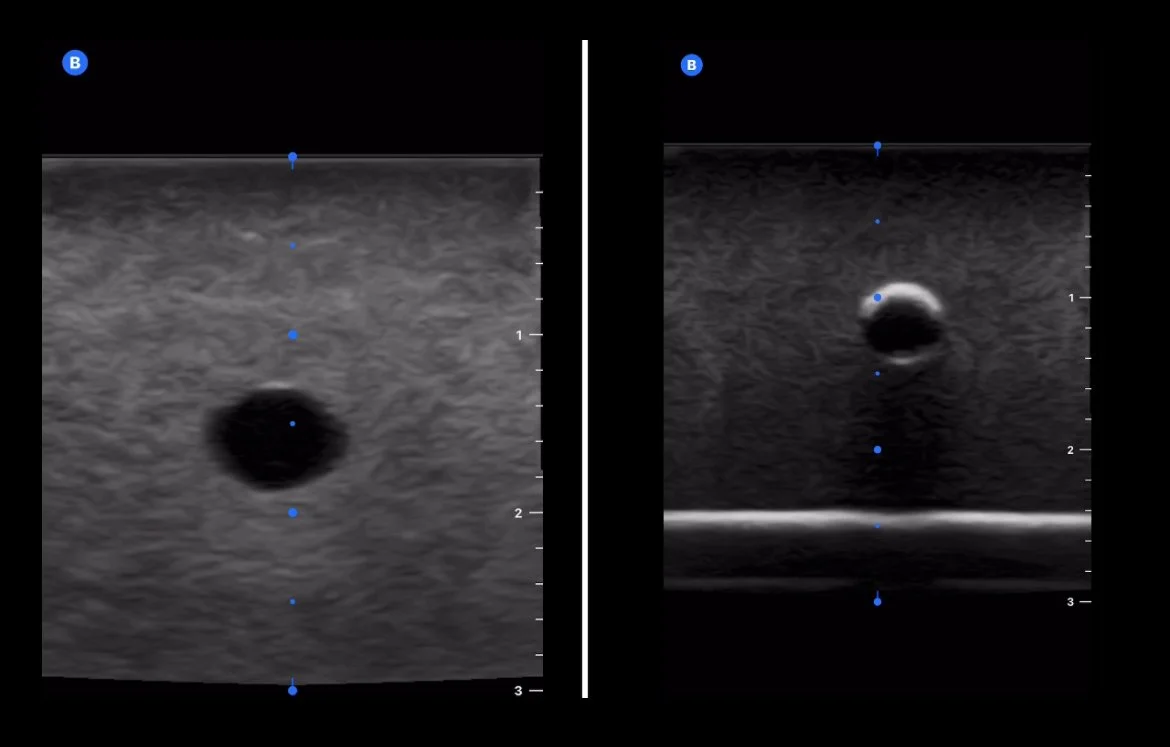
Left is a $500 training model from a medical simulation company. Right is the $10 DIY phantom I made. Pictures obtained using the Butterfly probe. Gain between both pictures are not equal.
Left is a $500 training model from a medical simulation company. Right is the $10 DIY phantom I made. Pictures obtained using the Butterfly probe. Gain between both pictures are not equal.